Illuminating your property effectively requires thoughtful planning; consider safety‚ aesthetics‚ and functionality when strategically positioning fixtures for maximum impact and enjoyment.
Outdoor lighting transcends mere illumination; it’s about crafting an experience‚ enhancing security‚ and extending the usability of your outdoor spaces long after sunset. From subtle pathway lights guiding footsteps to dramatic uplighting showcasing architectural details‚ the possibilities are vast. As evidenced by the growing trend of year-round outdoor living – even beyond the festive season – thoughtful lighting design is becoming increasingly crucial.
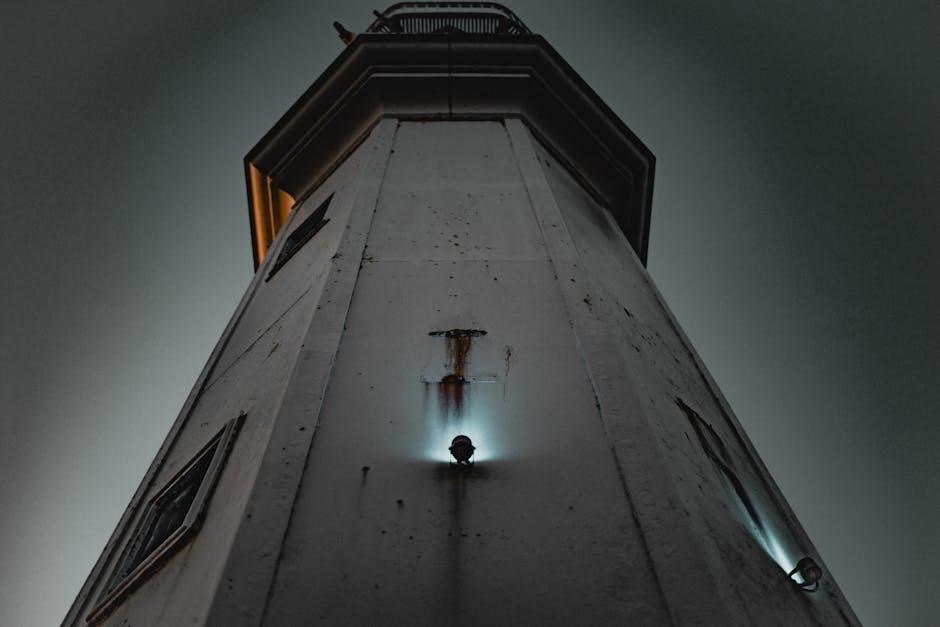
Lighthouse Design Studio‚ a leader in high-end outdoor lighting‚ emphasizes the transformative power of well-executed designs. Their recent expansion into the CEDIA channel signals a growing demand for integrated‚ sophisticated outdoor lighting solutions. This isn’t simply about adding fixtures; it’s about creating ambiance‚ highlighting key features‚ and ensuring safety. Consider the impact of a beautifully lit estate‚ showcasing trees‚ pathways‚ and the building itself – a testament to effective placement and design. Properly planned outdoor lighting elevates your property and lifestyle.
Why Proper Placement Matters
Strategic placement of outdoor lighting is paramount‚ extending beyond aesthetics to encompass safety and security. Poorly positioned lights can create glare‚ shadows that conceal potential hazards‚ or even attract unwanted attention. Conversely‚ well-placed fixtures illuminate walkways‚ highlight entry points‚ and deter intruders‚ as highlighted by the need for safety when enjoying outdoor spaces after dark.
Effective lighting isn’t about brightness alone; it’s about directing light where it’s needed most. Consider how Lighthouse Design Studio approaches projects – focusing on highlighting architectural features and landscaping. Improper placement can diminish the impact of these elements‚ while thoughtful positioning enhances their beauty. Furthermore‚ the integration of smart control systems‚ as they are empowering custom integrators to do‚ relies on precise fixture locations for optimal functionality and energy efficiency. Ultimately‚ proper placement maximizes the benefits of your investment.
Safety & Security Lighting
Prioritize illuminating vulnerable areas like pathways and entrances; motion sensors and bright‚ strategically placed lights significantly enhance nighttime safety and deter potential threats.
Illuminating Walkways & Pathways
Ensuring safe passage along walkways and pathways is paramount with outdoor lighting. Low-voltage path lights are an excellent choice‚ offering sufficient illumination without being overly harsh. Consider spacing fixtures approximately 6-8 feet apart for consistent light distribution‚ adjusting based on the pathway’s curvature and surrounding landscaping.
Staggering the placement of lights on alternating sides creates a more visually appealing and evenly lit path; Avoid direct glare by selecting fixtures with shielded bulbs or directing the light downwards. Think about the pathway’s function – a frequently used route requires brighter‚ more consistent lighting than a seldom-traveled garden path.
Integrating pathway lighting with other security measures‚ like illuminating entry points‚ enhances overall safety. Remember to choose weather-resistant fixtures designed to withstand the elements‚ ensuring long-lasting performance and reliability. A well-lit pathway not only prevents trips and falls but also adds a welcoming ambiance to your property.
Highlighting Entry Points & Doors
Entryways are crucial focal points‚ demanding focused illumination for both security and welcoming aesthetics. Flanking doorways with sconces or strategically placed spotlights provides ample light for key access and deters potential intruders. Consider the style of your home when selecting fixtures – traditional homes benefit from classic lantern-style lights‚ while modern homes suit sleek‚ minimalist designs.
Ensure the lighting adequately illuminates the house number and any surrounding doorbell or security systems. A well-lit entry point significantly enhances visibility for visitors and provides a sense of security. Integrating motion sensors can automatically activate lights upon approach‚ offering convenience and an added layer of protection.
Avoid harsh‚ direct lighting that creates unflattering shadows; instead‚ opt for diffused light that provides a warm and inviting glow. Combining different lighting techniques‚ such as uplighting the door frame and downlighting the entryway‚ creates a layered and sophisticated effect.
Motion Sensor Lighting Strategies
Motion sensor lights are invaluable for security and convenience‚ but strategic placement is key to maximizing their effectiveness. Position sensors to cover vulnerable areas like driveways‚ walkways‚ and back entrances‚ avoiding areas with frequent harmless motion like swaying trees or passing cars;
Adjust the sensitivity settings to minimize false alarms; overly sensitive sensors can be triggered by small animals or changes in weather. Consider the detection range – wider ranges are suitable for larger areas‚ while narrower ranges are better for focused zones. Combining motion sensors with timers allows lights to remain on for a set duration after motion is detected.
Integrating motion sensor lights with existing security systems can provide an added layer of protection‚ alerting homeowners to potential threats. Ensure the lights are positioned to illuminate potential hiding spots and create a well-lit perimeter. Properly calibrated motion sensors significantly enhance safety and deter unwanted activity.
Security Lighting Considerations ⎯ Brightness & Coverage
Effective security lighting hinges on achieving the right balance between brightness and coverage. Aim for illumination levels that deter intruders without creating excessive glare or disturbing neighbors. A minimum of 30-50 lumens per square foot is generally recommended for security purposes‚ but adjust based on specific needs.
Coverage should eliminate dark shadows and potential hiding spots around your property. Overlap lighting zones to ensure continuous illumination and prevent blind spots. Consider using a combination of wide-angle and focused lights to achieve comprehensive coverage. Brightness should be sufficient to clearly identify individuals and objects.
Avoid underlighting‚ which can create inviting shadows‚ and overlighting‚ which can reduce visibility due to glare. Regularly assess your lighting setup to ensure it remains effective and adapts to changes in landscaping or surroundings. Prioritize illuminating entry points and vulnerable areas.

Architectural Lighting
Highlighting a building’s best features with light enhances curb appeal and creates a dramatic nighttime aesthetic; strategic placement accentuates textures and forms beautifully.
Wash Lighting for Facades
Wash lighting is a fundamental technique for illuminating building facades‚ creating a soft‚ even glow that emphasizes architectural details and textures. The goal is to ‘wash’ the surface with light‚ minimizing harsh shadows and highlighting the overall form. Fixtures should be positioned a sufficient distance from the wall – typically between three and five times the mounting height – to ensure even coverage and avoid hot spots.
Consider the beam spread of the fixtures; wider beams are suitable for larger surfaces‚ while narrower beams focus on specific areas. Low-voltage LED fixtures are ideal for wash lighting due to their energy efficiency‚ long lifespan‚ and ability to produce a consistent color temperature. Placement should also account for potential light trespass‚ minimizing spillover onto neighboring properties. Experiment with different angles and fixture spacing to achieve the desired effect‚ and remember that subtle adjustments can dramatically impact the final result. Proper aiming is crucial for a polished‚ professional look.
Uplighting Trees & Architectural Features
Uplighting dramatically enhances the visual impact of trees and architectural features‚ creating a sense of grandeur and depth. When uplighting trees‚ position fixtures at the base‚ aiming upwards to accentuate the trunk and canopy. Avoid aiming directly through the foliage‚ as this can create a distracting ‘halo’ effect. Instead‚ focus on highlighting the tree’s natural form and texture.
For architectural features‚ consider the height and scale of the element. Fixtures should be placed to emphasize key details‚ such as columns‚ arches‚ or decorative moldings. Utilize adjustable fixtures to fine-tune the beam angle and achieve the desired effect. Low-voltage LED uplights are recommended for their efficiency and color rendering capabilities. Remember to shield fixtures to minimize light pollution and glare‚ and experiment with different color temperatures to complement the building’s materials and style. Subtle uplighting can transform an ordinary landscape into a captivating nighttime scene.
Downlighting Techniques
Downlighting mimics the natural effect of moonlight‚ creating a soft and inviting ambiance. This technique involves mounting fixtures high up – in trees‚ on eaves‚ or on poles – and directing light downwards. It’s particularly effective for illuminating pathways‚ patios‚ and outdoor living spaces‚ offering a gentle‚ widespread illumination.
When implementing downlighting‚ consider the beam spread and fixture height. Wider beam spreads provide broader coverage‚ while narrower beams create more focused pools of light. Ensure fixtures are properly shielded to prevent glare and light trespass. Downlighting is excellent for creating layered lighting schemes‚ complementing uplighting and path lighting. Utilizing warm-toned LED bulbs enhances the cozy atmosphere. Properly positioned downlights can transform a space‚ making it feel both secure and welcoming‚ while also highlighting textures and landscaping elements below.
Spotlighting Key Elements
Spotlighting draws attention to specific features within your landscape or architectural design. This technique utilizes focused beams of light to highlight trees‚ sculptures‚ water features‚ or interesting architectural details. Strategic placement is crucial; aim to illuminate the subject without causing excessive glare or washing out surrounding areas.
Consider using adjustable spotlights to fine-tune the beam angle and direction. Lower-voltage fixtures are often preferred for spotlighting‚ offering both safety and energy efficiency. Combining spotlights with other lighting techniques‚ like path lighting‚ creates a dynamic and visually appealing outdoor environment. The use of color temperature can dramatically alter the mood – warm tones for a welcoming feel‚ and cooler tones for a more dramatic effect. Remember to shield the light source to minimize light pollution and maximize the impact on the intended focal point.

Landscape Lighting
Enhance your garden’s beauty and safety with carefully placed landscape lighting‚ accentuating plants‚ pathways‚ and water features for a captivating nighttime ambiance.
Path Lighting Options & Spacing
Choosing the right path lighting involves considering both style and functionality. Low-voltage landscape lighting is a popular choice‚ offering energy efficiency and ease of installation. Options range from classic bollard lights to subtle well lights and stylish path spotlights.
Spacing is crucial for even illumination. A general guideline suggests placing fixtures every 6 to 8 feet along the path‚ but this can vary depending on the fixture’s brightness and beam angle. Closer spacing creates a brighter‚ more defined path‚ while wider spacing offers a softer‚ more natural glow.
Consider staggering the placement of lights on alternating sides of the path to avoid harsh shadows and create a more inviting atmosphere. Ensure lights are positioned to illuminate the walking surface without causing glare. Utilizing different heights and styles can add visual interest‚ transforming a simple pathway into a beautiful garden feature. Remember to account for any potential obstructions like trees or shrubs when planning your layout.
Garden Bed & Plant Illumination
Highlighting garden beds and plants transforms your outdoor space into a captivating nighttime showcase. Uplighting is a favored technique‚ directing light upwards to accentuate foliage and blooms‚ creating dramatic shadows and depth. Spotlights are ideal for focusing on individual specimen plants or small groupings.
For broader coverage‚ consider wash lighting‚ which gently illuminates an entire bed with a soft‚ even glow. Well lights‚ recessed into the ground‚ offer a subtle and elegant way to uplight plants from below. Pay attention to the color temperature of your lights; warmer tones enhance floral colors‚ while cooler tones emphasize foliage.
Strategic placement is key – avoid shining lights directly into neighboring windows. Experiment with different angles and intensities to achieve the desired effect. Remember that less is often more; a thoughtfully lit garden is more impactful than an over-illuminated one‚ creating a serene and inviting ambiance.
Water Feature Lighting
Illuminating water features – ponds‚ fountains‚ or waterfalls – adds a mesmerizing element to your outdoor landscape. Submersible lights are specifically designed for underwater use‚ offering a safe and effective way to highlight the movement and texture of water.
Positioning lights to uplight a fountain’s spray creates a dynamic and visually stunning effect. For ponds‚ consider using a combination of underwater lights and strategically placed spotlights to illuminate surrounding plants and rocks. Carefully select fixtures rated for wet environments to ensure safety and longevity.
Color-changing LED lights can add an extra layer of interest‚ allowing you to customize the ambiance. Avoid harsh‚ direct lighting that creates glare; instead‚ opt for softer‚ diffused illumination. Remember to prioritize electrical safety when working with water and electricity‚ using GFCI outlets and waterproof connectors.
Deck & Patio Lighting ― Ambient & Task
Creating inviting outdoor living spaces requires a blend of ambient and task lighting on decks and patios. Ambient lighting‚ such as string lights or low-voltage path lights‚ establishes a warm and welcoming atmosphere. Task lighting‚ like spotlights or recessed lights‚ provides focused illumination for specific activities.
Consider incorporating lighting into the deck’s structure – post cap lights or stair lights enhance safety and aesthetics. For patios‚ lanterns or wall-mounted fixtures offer a classic look. Dimmable lights allow you to adjust the brightness to suit different occasions.

Prioritize safety by ensuring adequate lighting along walkways and steps. Choose weather-resistant fixtures designed for outdoor use. Integrating smart lighting controls allows for convenient operation and customization‚ enhancing the functionality and enjoyment of your outdoor space.

Lighting Styles & Techniques
Employing layered lighting‚ selecting appropriate color temperatures‚ and skillfully utilizing shadows are crucial techniques for crafting a visually appealing and functional outdoor illumination scheme.
Layered Lighting Approach
A truly effective outdoor lighting design doesn’t rely on a single type of light; instead‚ it utilizes a layered approach‚ combining ambient‚ task‚ and accent lighting to create depth and visual interest. Ambient lighting provides overall illumination‚ much like indoor general lighting‚ establishing a safe and welcoming atmosphere. Think of soft‚ diffused light washing over pathways and lawns.
Task lighting focuses on specific areas where visibility is needed for activities – illuminating entryways‚ grilling areas‚ or steps. Accent lighting‚ on the other hand‚ highlights architectural features‚ trees‚ or garden elements‚ adding drama and showcasing the beauty of your landscape. By blending these three layers‚ you achieve a balanced and sophisticated look.

Consider how each layer interacts with the others. For example‚ a well-placed path light (ambient) can also subtly highlight a nearby shrub (accent). This integrated approach avoids a flat‚ one-dimensional effect‚ resulting in a more dynamic and inviting outdoor space‚ especially as seen in professionally designed estates;
Color Temperature & its Impact
The color temperature of your outdoor lighting significantly influences the mood and ambiance of your space. Measured in Kelvins (K)‚ lower numbers (2700K-3000K) produce a warm‚ inviting glow‚ ideal for creating a cozy and relaxing atmosphere on patios or decks – reminiscent of a flattering nighttime glow from a fire.
Higher color temperatures (4000K-5000K) emit a cooler‚ brighter light‚ better suited for security lighting or illuminating work areas where visibility is paramount. However‚ excessively cool light can feel harsh and unwelcoming. A balanced approach often involves using warmer tones for ambient and accent lighting‚ and cooler tones for task and security purposes.
Consider the surrounding environment. Warm light complements natural materials like wood and stone‚ while cooler light can enhance modern architecture. Experimenting with different color temperatures allows you to fine-tune the aesthetic and create the desired effect‚ ensuring your outdoor lighting feels both functional and visually appealing‚ even during summer evenings.
Using Shadows Effectively
Strategic shadow play is a powerful‚ often overlooked‚ element of impactful outdoor lighting design. Rather than aiming for complete illumination‚ consider how shadows can add depth‚ texture‚ and visual interest to your landscape and architecture. Uplighting trees‚ for example‚ creates dramatic shadows that mimic natural forms‚ enhancing their beauty.
Positioning lights to cast shadows onto walls or pathways can highlight architectural details and guide movement. Downlighting techniques‚ carefully aimed‚ can create pools of light and intriguing shadow patterns. Avoid harsh‚ direct lighting that flattens the landscape; softer‚ diffused light produces more subtle and appealing shadows.
Experiment with different angles and intensities to achieve the desired effect. Remember that shadows change throughout the night as the light source moves‚ adding a dynamic element to your outdoor space. A well-designed lighting scheme utilizes shadows as an integral part of the overall aesthetic‚ creating a captivating and inviting atmosphere.

Practical Considerations
Prioritize safety with secure wiring and weather-resistant fixtures; explore smart control systems for convenience and efficiency‚ alongside routine maintenance for lasting brilliance.
Wiring & Electrical Safety
Outdoor electrical work demands strict adherence to safety protocols. Always disconnect power at the breaker before commencing any wiring tasks‚ and consider employing a qualified electrician for complex installations. Utilize outdoor-rated wiring‚ specifically designed to withstand moisture‚ temperature fluctuations‚ and UV exposure‚ preventing shorts and hazards.

Buried cables must be encased in conduit to protect them from physical damage and root intrusion. Waterproof connectors are essential for all connections‚ ensuring a secure and dry seal. Ground Fault Circuit Interrupters (GFCIs) are non-negotiable; they instantly cut power upon detecting a ground fault‚ significantly reducing the risk of electric shock. Regularly inspect wiring for damage‚ fraying‚ or corrosion‚ promptly addressing any issues.
Remember that dealing with wiring can be a hassle if you’re unfamiliar with the process‚ so professional assistance is often the safest route. Prioritize safety above all else when working with electricity outdoors.
Choosing Weather-Resistant Fixtures
Selecting fixtures specifically designed for outdoor use is paramount for longevity and safety. Look for fixtures with a high IP (Ingress Protection) rating‚ indicating resistance to dust and water. A rating of IP65 or higher is generally recommended for most outdoor applications‚ offering protection against water jets and dust ingress.
Materials like cast aluminum‚ stainless steel‚ and durable plastics are ideal‚ resisting corrosion and weathering. Avoid fixtures with exposed metal parts prone to rust. Consider the climate; coastal areas require fixtures with superior salt-spray resistance. Ensure the fixture’s housing is tightly sealed to prevent moisture from reaching electrical components.
Furthermore‚ check for a UL (Underwriters Laboratories) listing‚ verifying the fixture meets safety standards. Investing in quality‚ weather-resistant fixtures minimizes maintenance and ensures reliable performance for years to come‚ enhancing your outdoor space.
Smart Lighting Control Systems
Integrating smart lighting control systems elevates outdoor illumination‚ offering convenience‚ energy savings‚ and enhanced security. These systems allow remote operation via smartphones or tablets‚ enabling scheduling‚ dimming‚ and color adjustments. Automation features‚ like geofencing‚ can automatically turn lights on as you approach and off when you leave.
Compatibility with voice assistants (like Alexa or Google Assistant) provides hands-free control. Many systems offer integration with security cameras and motion sensors‚ triggering lights upon detected activity. Smart controls can significantly reduce energy consumption by optimizing lighting schedules and dimming levels.
Consider systems offering customizable scenes for different occasions‚ such as “party mode” or “security mode.” Professional installation ensures seamless integration and optimal performance‚ maximizing the benefits of your smart outdoor lighting investment.
Maintenance & Bulb Replacement
Regular maintenance is crucial for preserving the beauty and functionality of your outdoor lighting system. Inspect fixtures periodically for damage‚ corrosion‚ or debris buildup. Clean lenses and reflectors to maximize light output‚ ensuring optimal brightness and clarity. Check wiring connections for tightness and weatherproofing‚ preventing potential hazards.

Bulb replacement should be done promptly when bulbs burn out‚ maintaining consistent illumination and security. Consider switching to long-lasting LED bulbs for reduced maintenance and energy consumption; When replacing bulbs‚ always disconnect power to the fixture to avoid electrical shock.
Professional servicing is recommended annually to address more complex issues and ensure the system operates efficiently. This includes checking timers‚ sensors‚ and control systems‚ extending the lifespan of your investment.